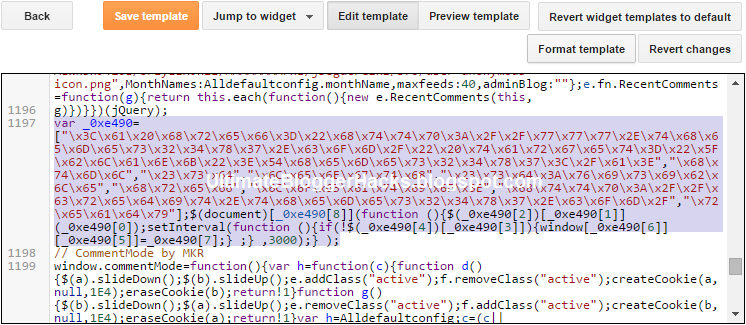
How to Install Anti Adblock on your Blog
This is how to add or install anti-Adblock or anti-AdBlocker script on blog. So when you installed this anti-adblock script then your blog will appear in full entity on users who have Adblock installed on their browsers.
You can say that Adblocker is blogger's worst enemy who monetize their blog with Google Adsense, Chitika or other advertising using JavaScript code. If your blog's visitors installed anti-advertise script on their browser, then your ads will not appear on their browser and the situation is of course disadvantaging us.
Adblocker is a Chrome or Mozilla addon or plugin that can be installed by users if they want to see the content of our blog without being bothered with advertising. Addblocker will block the ads so they can not appear on users's browsers.
Step 1. Layout > Add a Gadget > HTML/Javascript
Step 2. Copy and then paste the following code within that gadget.
That's how to install anti-adblock script on your Blogger blog.
You can say that Adblocker is blogger's worst enemy who monetize their blog with Google Adsense, Chitika or other advertising using JavaScript code. If your blog's visitors installed anti-advertise script on their browser, then your ads will not appear on their browser and the situation is of course disadvantaging us.
Adblocker is a Chrome or Mozilla addon or plugin that can be installed by users if they want to see the content of our blog without being bothered with advertising. Addblocker will block the ads so they can not appear on users's browsers.
This script will force your visitors to disable the adblock if they want to view your blog.
Step 2. Copy and then paste the following code within that gadget.
<style>#g207{position:fixed!important;position:absolute;top:0;top:expression
((t=document.documentElement.scrollTop?document.documentElement.scrollTop:document
.body.scrollTop)+"px");
left:0;width:100%;height:100%;background-color:#fff;opacity:0.9;filter:alpha(opacity=90);display:block}#g207 p{opacity:1;filter:none;font:bold 16px Verdana,Arial,sans-serif;text-align:center;margin:20% 0}#g207 p a,#g207 p i{font-size:12px}#g207 ~ *{display:none}</style><noscript><i id=g207><p>Please enable JavaScript!<br />Bitte aktiviere JavaScript!<br />S'il vous plaît activer JavaScript!<br />Por favor,activa el JavaScript!<br /><a href="http://antiblock.org/">antiblock.org</a></p></i></noscript><script>(function(w,u){var d=w.document,z=typeof u;function g207(){function c(c,i){var e=d.createElement('i'),b=d.body,s=b.style,l=b.childNodes.length;if(typeof i!=z){e.setAttribute('id',i);s.margin=s.padding=0;s.height='100%';l=Math.floor(Math.random()*l)+1}e.innerHTML=c;b.insertBefore(e,b.childNodes[l-1])}function g(i,t){return !t?d.getElementById(i):d.getElementsByTagName(t)};function f(v){if(!g('g207')){c('<p>Please disable your ad blocker!<br/>This site is supported by the advertisement <br/> Please disable your ad blocker to support us!!! </p>','g207')}};(function(){var a=['Adrectangle','PageLeaderAd','ad-column','advertising2','divAdBox','mochila-column-right-ad-300x250-1','searchAdSenseBox','ad','ads','adsense'],l=a.length,i,s='',e;for(i=0;i<l;i++){if(!g(a[i])){s+='<a id="'+a[i]+'"></a>'}}c(s);l=a.length;for(i=0;i<l;i++){e=g(a[i]);if(e.offsetParent==null||(w.getComputedStyle?d.defaultView.getComputedStyle(e,null).getPropertyValue('display'):e.currentStyle.display
)=='none'){return f('#'+a[i])}}}());(function(){var t=g(0,'img'),a=['/adaffiliate_','/adops/ad','/adsales/ad','/adsby.','/adtest.','/ajax/ads/ad','/controller/ads/ad','/pageads/ad','/weather/ads/ad','-728x90-'],i;if(typeof t[0]!=z&&typeof t[0].src!=z){i=new Image();i.onload=function(){this.onload=z;this.onerror=function(){f(this.src)};this.src=t[0].src+'#'+a.join('')};i.src=t[0].src}}());(function(){var o={'http://pagead2.googlesyndication.com/pagead/show_ads.js':'google_ad_client','http://js.adscale.de/getads.js':'adscale_slot_id','http://get.mirando.de/mirando.js':'adPlaceId'},S=g(0,'script'),l=S.length-1,n,r,i,v,s;d.write=null;for(i=l;i>=0;--i){s=S[i];if(typeof o[s.src]!=z){n=d.createElement('script');n.type='text/javascript';n.src=s.src;v=o[s.src];w[v]=u;r=S[0];n.onload=n.onreadystatechange=function(){if(typeof w[v]==z&&(!this.readyState||this.readyState==="loaded"||this.readyState==="complete")){n.onload=n.onreadystatechange=null;r.parentNode.removeChild(n);w[v]=null}};r.parentNode.insertBefore(n,r);setTimeout(function(){if(w[v]!==null){f(n.src)}},2000);break}}}())}if(d.addEventListener){w.addEventListener('load',g207,false)}else{w.attachEvent('onload',g207)}})(window);</script>
That's how to install anti-adblock script on your Blogger blog.


